Post-Production
It is the stage after production when the filming is completed, and the audio and visual material is edited. In post-production, the tasks that include cutting raw footage, editing that footage, adding music and sound effects are all included.Adobe Premiere Pro
During my lesson today, we were asked to edit some raw videos. We used Adobe Premiere Pro, a professional-level digital video editing program with everything an editor could possibly need.
We were asked to watch a selection of projects from this YouTube channel called 'Corridor Crew'. One of them featured a new crash pad, and the group filmed themselves using and breaking in the mat. I selected the topic because I found it the most exciting set of videos. In addition, it included more action than the others.
After choosing the raw footage, I selected parts of the clip using the 'in' and 'out' buttons and dragged them onto my timeline.
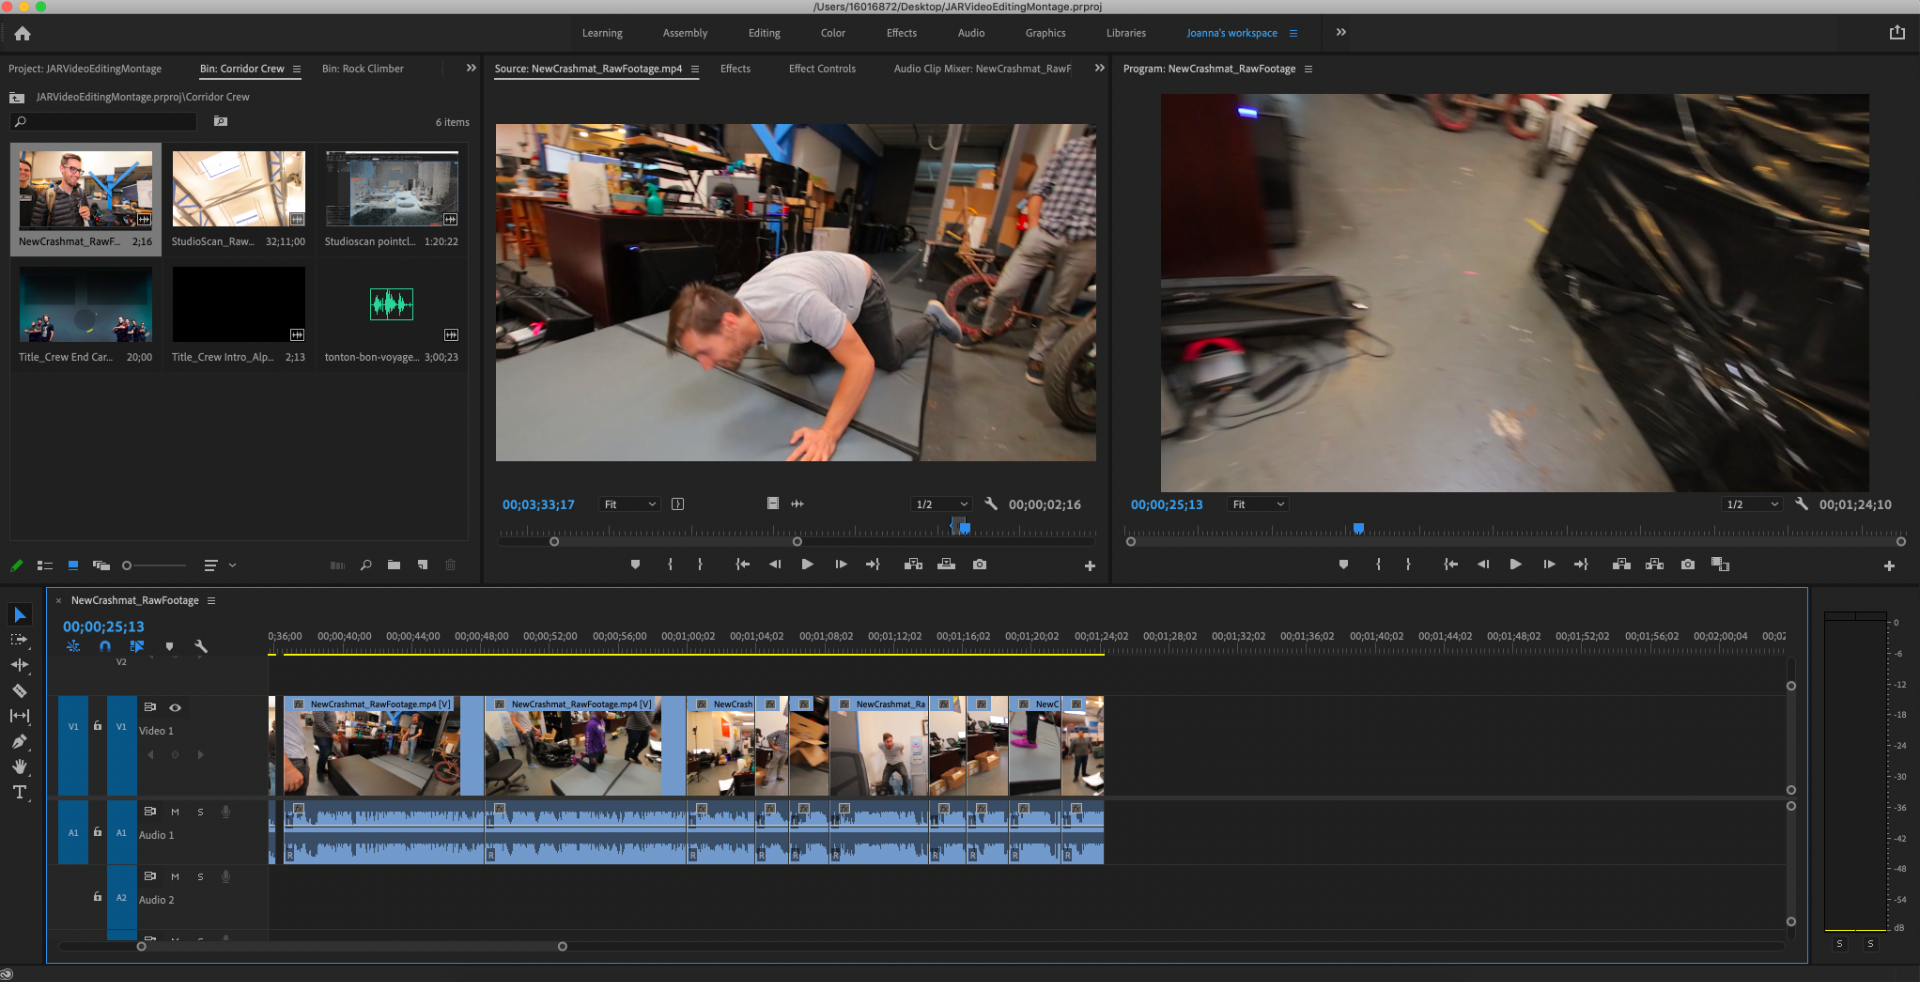
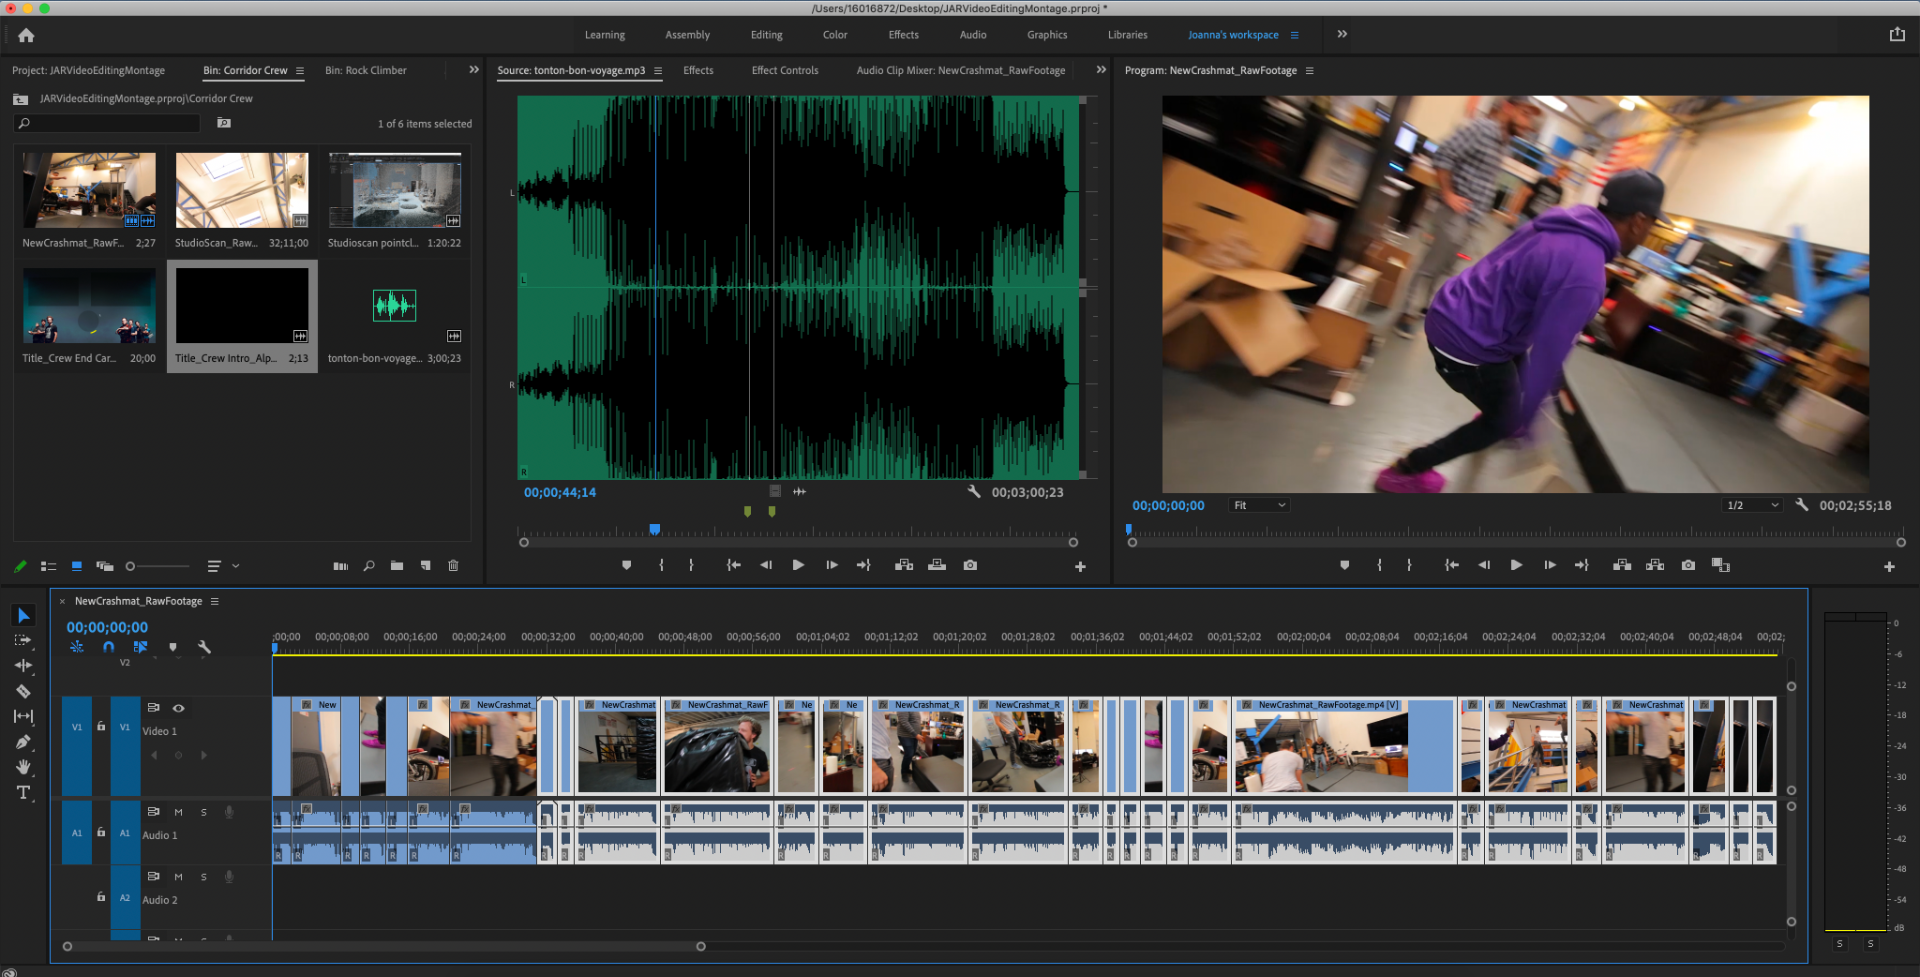
Once inserting them onto the timeline, I added the intro graphics at the beginning of the video. This was important because the intro animation is a feature in EVERY video they upload to their channel. It can be seen at the beginning of the video primarily, but it isn't uncommon for the creators to add a sneak peek before the video's intro.
I took advantage of this and added slow-motion clips of the flips and gymnastics the creators performed in the video. This was done to capture the audience's attention if they want to see more jumps and flips later on.
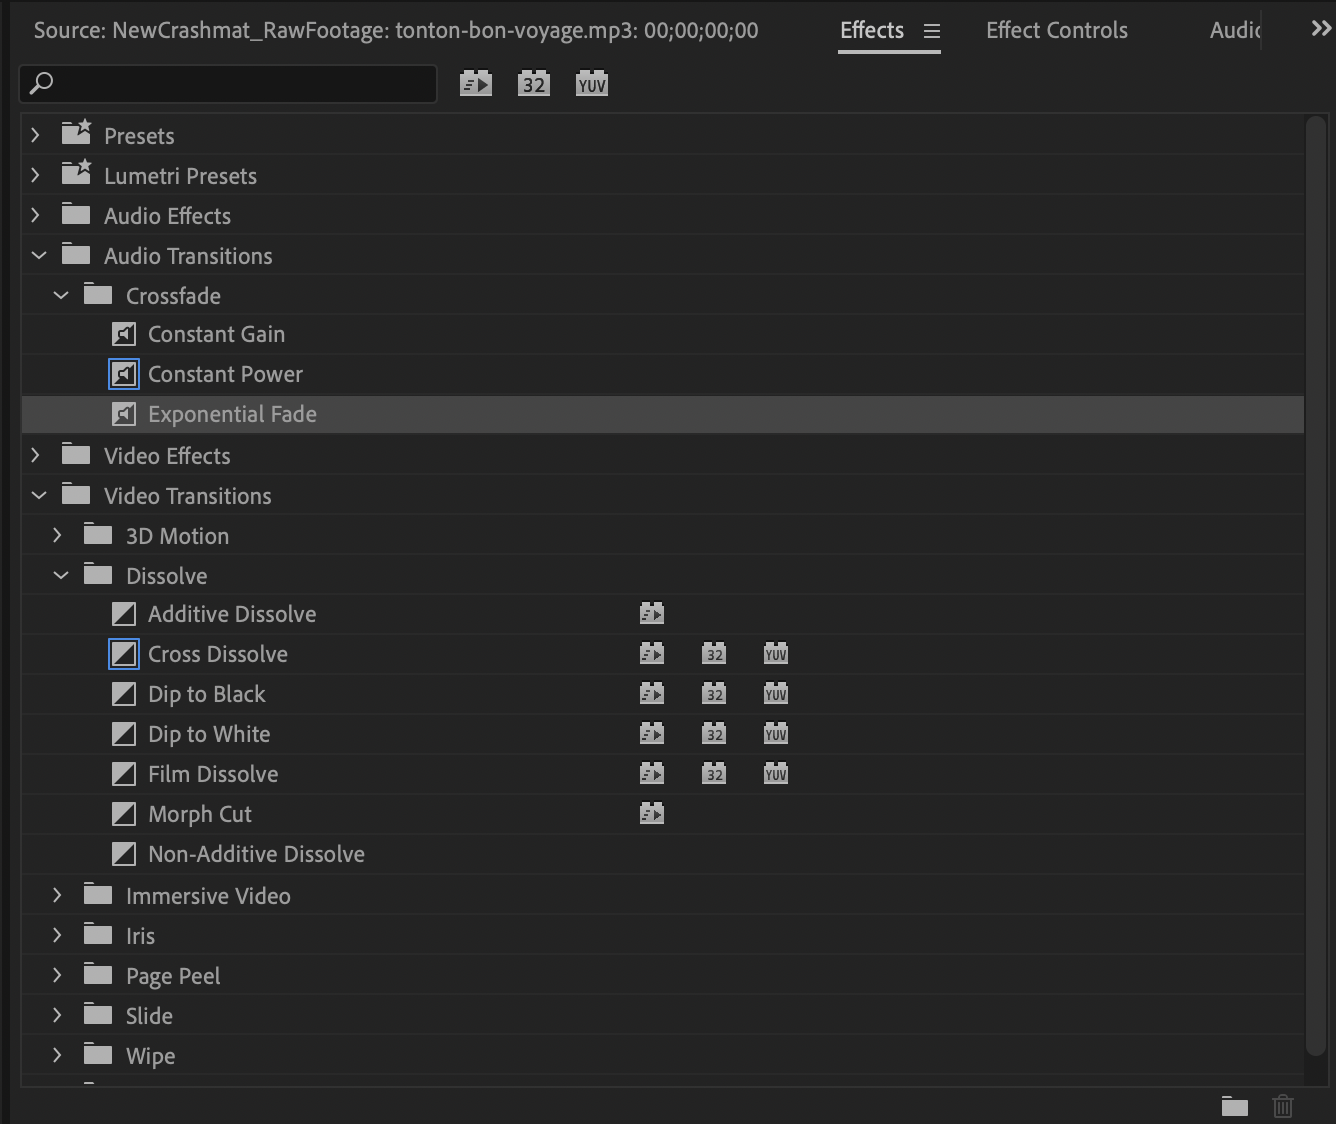
Once I was pleased with the order of the video, I added a few effects to the videos. Using the Audio Transitions folder, I found the 'Constant Gain' effect and added it to the first clip after the intro. Then, I added the 'Exponential Fade' Effect to the last clip before the 'Outro' Graphic.
In the folder containing the raw footage, the two music tracks included were royalty-free, otherwise known as 'Copyright free'. These are available for most creators to use in their content without the risk of a claim being made. I chose the track I liked most and added it to the video as background music.
The track was too loud, and the audience would not have heard the original audio. So I lowered the music volume to an appropriate level.
The clip below is my final edit. I have a lot of experience in editing YouTube videos, so it was a lot of fun. I like using Adobe Premiere Pro because it has everything I needed to create a clean, original edit.
The original raw footage was well shot. The cameraman used a wide variety of different camera angles throughout the whole raw video. This made it more interesting to watch and edit. The video quality was high, and it came out looking just as clear as their other content.
The sound recording was as good as they probably could get it. However, they were filming in a warehouse-type of building, and this would no doubt have a lot of reverberation. This can be a very tricky environment to film and record in due to the risk of the audio sounding distorted and hard to understand. To fix this, they could add sound insulation/acoustic foam around the space. But this may be expensive and may not still produce perfect results.
The purpose of the video was intended as a fun vlog style of YouTube video. It was to show the audience their new Crashmatt and explain what it is used for. One of the presenters also explained where they got it from and why it would be used. He also explained how difficult they were to get hold of. I felt as though those details were essential to keep in as they were very informative.
In the clip linked above, you will be able to see my attempt at using keyframes to zoom in and out. I did this using Adobe Premiere Pro.
It was a very simple process and is a useful skill that I will be able to use in any style of video. I wanted to zoom in on the record button then zoom out to its original scale.
On the 'Effects Control' panel, I added 4 keyframes on the scale and position tabs. Then selecting the relevant keyframes, I adjusted the scale and position until I zoomed into the image and was satisfied with the result.
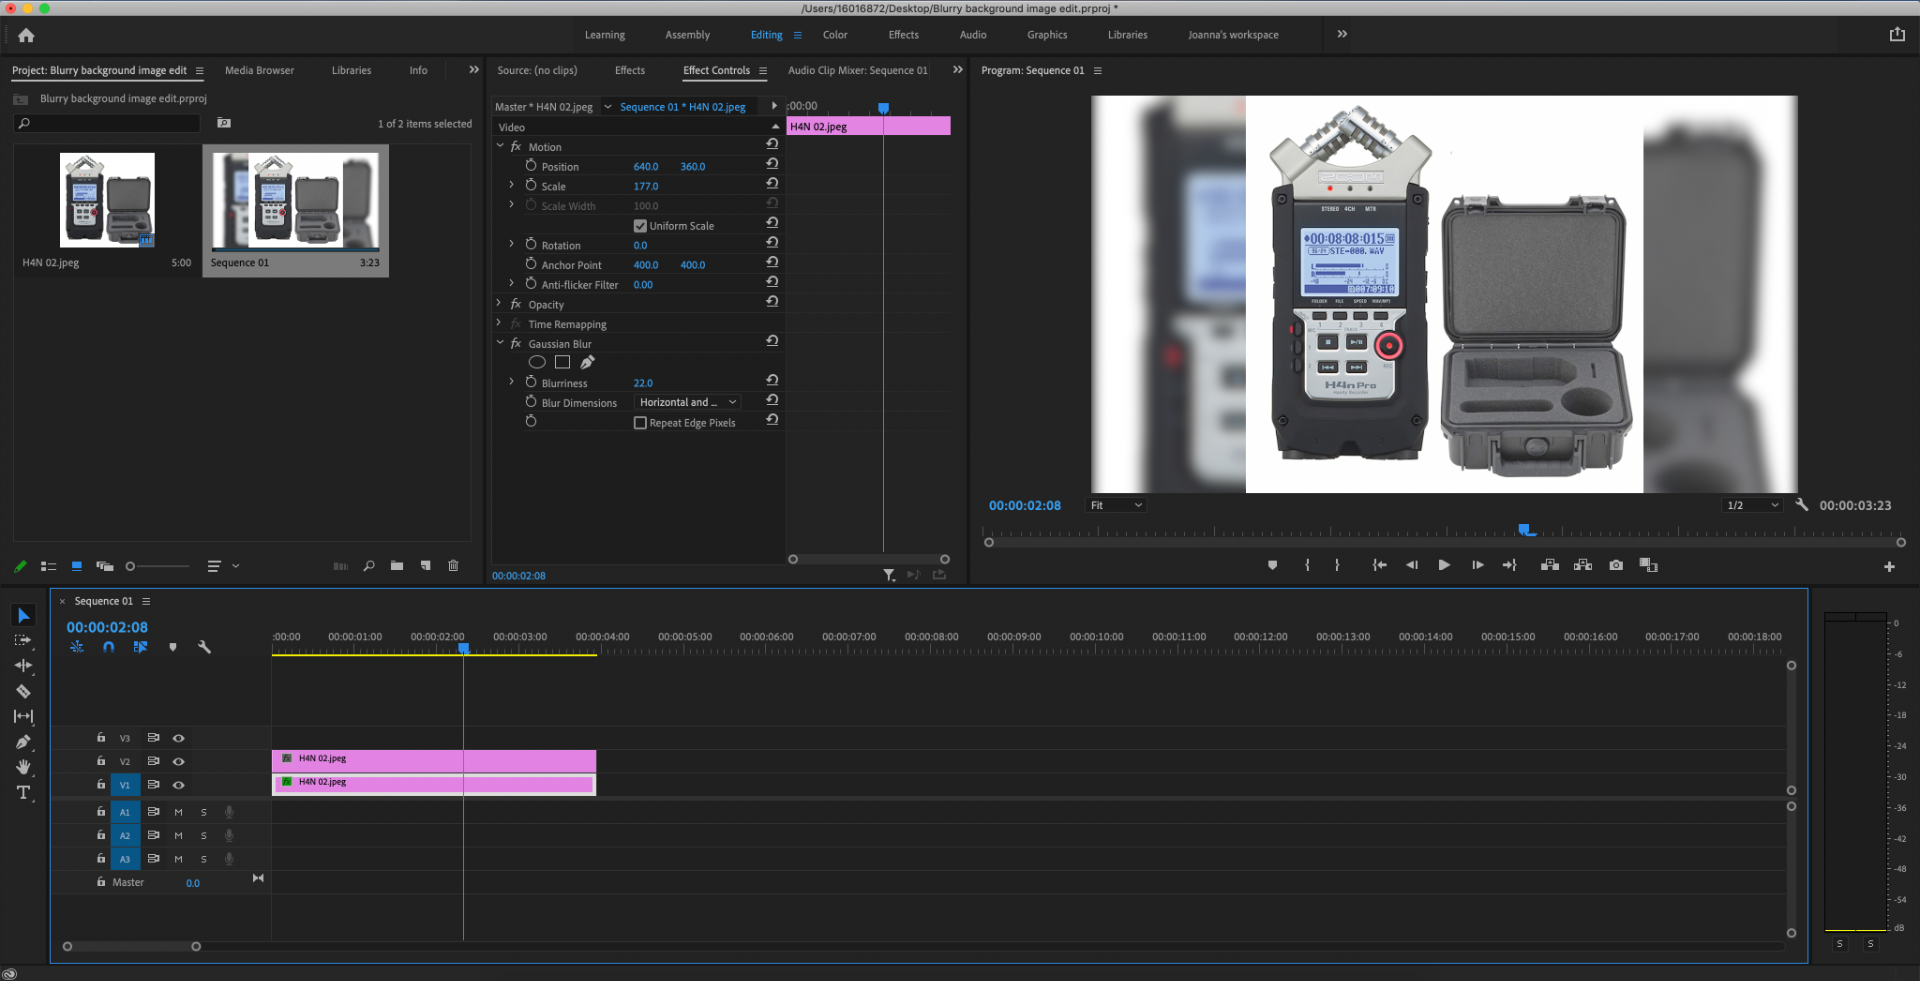
The clip above will show my attempt at a layered blurred video. This technique can be used for images and videos that vary in dimensions.
I demonstrated the technique on a square image, and as you can see from the screenshot, the dimensions don't watch the video. So, I duplicated the photos and layered one on top of the other. I then scaled the bottom one up until the screen was filled.
Lastly, I used the 'Gaussian Blur' Effect on the scaled-up image to achieve the unfocused look.
In the clip linked above, I demonstrate the use of the blurry background effect. To fully display the use of this technique I picked a video taken on a phone and that was filmed in portrait. If I did not use this technique there would be large black gaps on either side of the video.
I laid the clips atop each other and scaled the bottom clip up until it filled all the gaps. I then used the 'Gaussian Blur' video effect on the scaled-up video.
After Effects
Adobe After Effects is almost entirely used during post-production. The software's main purpose is digital visual effects and motion graphics. Other uses can be keying, tracking, composting and animation.
Today in class, we were taught how to use Adobe After Effects. It is a brilliant bit of software that allows anyone to create motion graphics, digital visual effects and animation.
First, we added our resources to the library. We created a Batman Logo/Animation in this project, so our files consisted of the Batman symbol and a short, blurry rainy scene of a city. I wanted to imitate the original intro, where the Batman symbol would spin and increase in scale. Layering the rainy scene behind the logo was crucial; otherwise the Batman symbol wouldn't be visible.
Second, I added keyframes to the Batman logo on scale and rotation, and I reduced scale until the image was too small to see. I also rotated the image twice. Adding more keyframes near the end of the clip, I reset the scale and rotation back to its original scale. After a test, I adjusted the image until I was happy with the result.
Thirdly, I highlighted the relevant keyframes and right-clicked them. This brought up the 'Keyframe Assistant' and 'Easy Ease' options. Selecting this option will smooth out the animations.
Fourthly I played around with the opacity of the image. The opacity means the transparency of something or how see through it is. So, at the end of my clip, I set two keyframes and made the symbol dissolve. I did this because it was visually pleasing and it completed the clip.
Lastly, I exported the clip. Unfortunately, we could only export it as a .mov or a QuickTime file, but this was easy to convert to a .mp4 file later. Overall I was pleased with my animation. The software was straightforward to use, and it was easy to pick up on how to use a lot of the different elements.
Next time I make a title or animation I will make the background transparent/green screen because I could layer it on top of my official 'How to' video.
Using Adobe After Effects for the second time was a lot easier. This time around, our task was to incorporate text and sound.
We used an image of the 'Zoom' audio recorders. These are the recorders which are provided by the college for the students use. We also got given a .png image of the 'Zoom' logo.
To begin, we created a new composition and added the images into the library. We then added different segments of text such as "How to", "Use the", "H4n", "Portable", and "Audio recorder". So I ended up with seven different layers I had to animate.
I wanted to use the variety of effects I was taught during the lesson, so I animated the .png of the recorder to spin and expand into position. To do this, I changed the position, rotation and scale settings.
Once I was pleased with this, I moved on to the "How to" text and the 'zoomrecorder.png'. I decided to change the position settings so they would both enter the frame from the right.
For the "portable" and "audio recorder" text, I changed the position settings so they would swoop up from the bottom into the frame.
The last animation I edited was the "use the" and the "H4n" text. I added the relevant keyframes to the layers and changed the opacity settings so the reader would appear simultaneously. I did this because it would be visually appealing.
Finally, I needed to include some audio. I thought it would be amusing to add in some kind of spinning sound to match the visual spinning effect. Once I found two sound effects I liked, I needed to convert the .caf files into an audio file which After Effects would read. To do this, I used QuickTime and exported them into .m4a files.
After they were converted, I added them into the After Effects library, which was promptly added to my clip. Unfortunately, the sound effects were far too loud, but I could edit this in the settings for each clip.
Overall I was extremely pleased with how the audio sounded alongside the visual effects. I think they matched up very well, and the spinning sound effect enhanced the look I was going for. The other animations look smooth and are well-timed. I managed to achieve this by matching up the keyframes on the timeline.

Graphic Intro Title
Using Adobe After Effects, I created a short intro animation for my 'How to' video. I was really pleased with the results as it looks very professional. I personally prefer transitions and titles to be simple and without too much fuss, but I had never created something fit for purpose like this before.
Creating this was fun because I really got to experiment with what the software had to offer. When I've made titles before, I only used the limited tools and effects that Adobe Premiere Pro had to offer.
I used the position sliders and keyframes to slide each text box into the frame for this animation. Initially, I had them come in slowly, but I wanted something swift and efficient in the end. In addition, I wanted to experiment with a greenscreen background so that when I added the animation to Adobe Premiere Pro, I could set the greenscreen to transparent using the 'Ultra Key' effect.
Editing Timelapse
The editing process took me just under an hour to complete. I planned to create a timelapse creating my graphic intro using the Adobe After Effects software, but the college computers don't have any screen recording software or anything I could easily use at least. So I adjusted my Production Schedule and filmed a timelapse of the editing process instead.
How to set up your Camera and TriPod
Version 4
I have created my first exported version of my 'How to set up a Camera and TriPod' video. This video was created as a tutorial for people who would like to learn how to set up their camera and tripod. My first project was planning and producing a 'How to', and we got given four topic choices.
- How to set up a Camera and TriPod
- How to use lighting in a video
- How to use various camera angles
- How to record sound
I chose 'How to set up a Camera and TriPod'. I did this because it was the least popular topic in my class. Only one or two other classmates chose it in comparison to 'How to use various camera angles.' I also decided on it because I saw it as a challenge. In the early stages of planning, I was already visualising my set-up.
Getting ideas and inspiration from already existing videos gained great research results. For example, I found and analysed three contrasting videos, varying from bad to okay to professional quality, which helped me find some dos and don'ts. It also gave me ideas on location.
Choosing my location was easy. I didn't want to film at college or home as I wanted to do something different. So I got in contact with my grandmother and asked her permission to film in her dining room. I've frequently been visiting her home for years, and I always love the lighting and feel of her dining room. It also is a perfect location for filming sound as there is no reverb or external noise. My granny and I planned a day where the gardener wouldn't be visiting. As he usually comes twice a week, getting a quiet day was important.
The filming went very well, and I am incredibly pleased with the results. The raw footage came out crystal clear, and I was delighted with the variety of camera angles I included. I recorded the audio on my external mic, which was attached to my clothing when I filmed.
Later, during editing, I realised I had made a mistake. Halfway through my video, I attach the platform to the camera, bashing the mic several times. I did my best to fix this using Adobe Premiere Pro effects, but you can still slightly hear this in the final project.
After I finished filming, I imported the raw audio and footage to my IPad. I did this because I wanted to check the quality of the audio and video before I left. If anything was seriously wrong with it, I could've reshot the whole thing that same day. I also wanted to have a backup in case I lost or damaged the SD cards.
Adobe Premiere Pro is a fantastic bit of software, and I have been using it for around four years. The editing process for version four took around an hour to complete. I have made similar tutorial-type videos before, paired with my experience with the software, I could finish the edit in no time.
I started a screen recording and filmed the whole process, which I later made into a timelapse. I did this to show the process and how I achieved my final result.
If I were to film again, I would like to add a brief summary where I retrace my progress. Then, I would just go over a simplified step by step guide to ensure the audience was following.
Version 5
In my second draft, I relied on feedback from Paul to improve my video. The bullet points below list the feedback I received:
The scene at 1'53, you could scale to crop out the room section on the left. This would place more emphasis on you rather than the background.
Response to feedback
First, I chose some appropriate copyright-free music to have in the background alongside my voiceover. I did this because it sounded pretty dull. I found the piece of music in my personal music library, which is full of other copyright-free songs and tunes that I have used in previous videos.
I then followed Paul's advice and edited my voiceover. It sounded a bit dull/dead, so I played around with the Adobe Premiere Pro dialogue presets until I was satisfied. I thought it was a bit quiet in some sections, so this also enabled the sound to be balanced all the way through.
I did not add a 'whoosh' sound effect to my title graphics. I chose to not do this because of personal preference and also artistic style. I have never really used sound effects in my videos before, unless the style of video demanded it.
The rest of the feedback I acted on and achieved to the best of my abilities. I'm incredibly pleased with how my video turned out, and I believe it is fit for purpose.